
Planning & Inspiration
Autumn Floral Wreaths Class by Bride & Blossom
Hello Bride and Blossom Readers!
As you may or may not know, we offer floral classes monthly! In the classes, besides enjoying some delicious wine and cheese, we invite one of our floral designers to come in and teach our students on several different techniques we use in the studio for our Bride & Blossom weddings! Floral design is super simple once you have the right supplies and clear steps. And it’s extremely relaxing and cathartic. Whether you’ve got a gorgeous garden and green thumb or you are a total novice, our classes are designed to teach you basic design principles that you can use again and again for making arrangements for your home, office or to give as gifts!

From Left: Designer Bianca Serafica, Photo Intern Deanna Basile and Me!
This September, the theme of our class was Autumn Floral Wreaths, taught by the lovely Bianca Serafica and photographed and filmed by our amazing photo intern Deanna Basile!
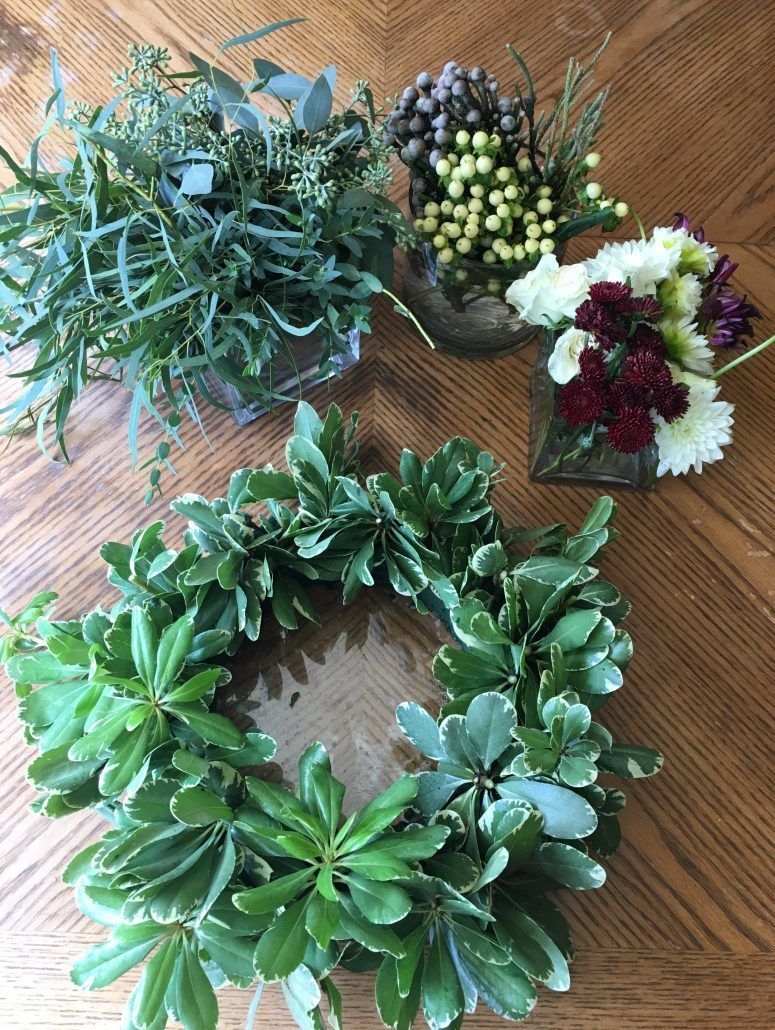
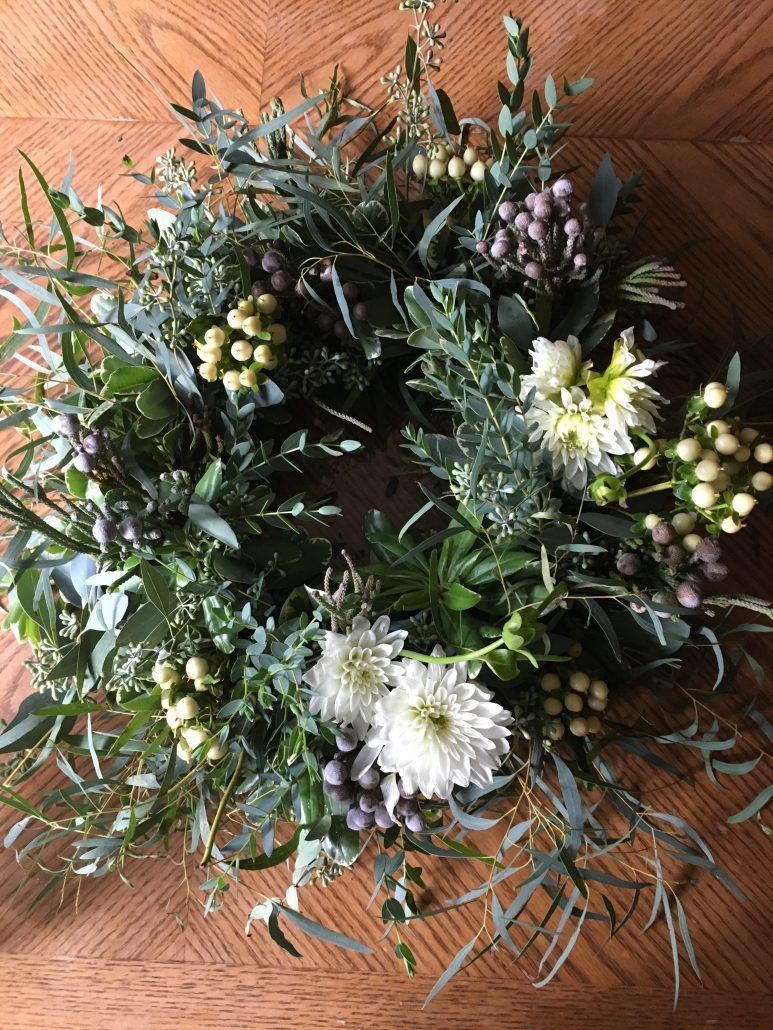
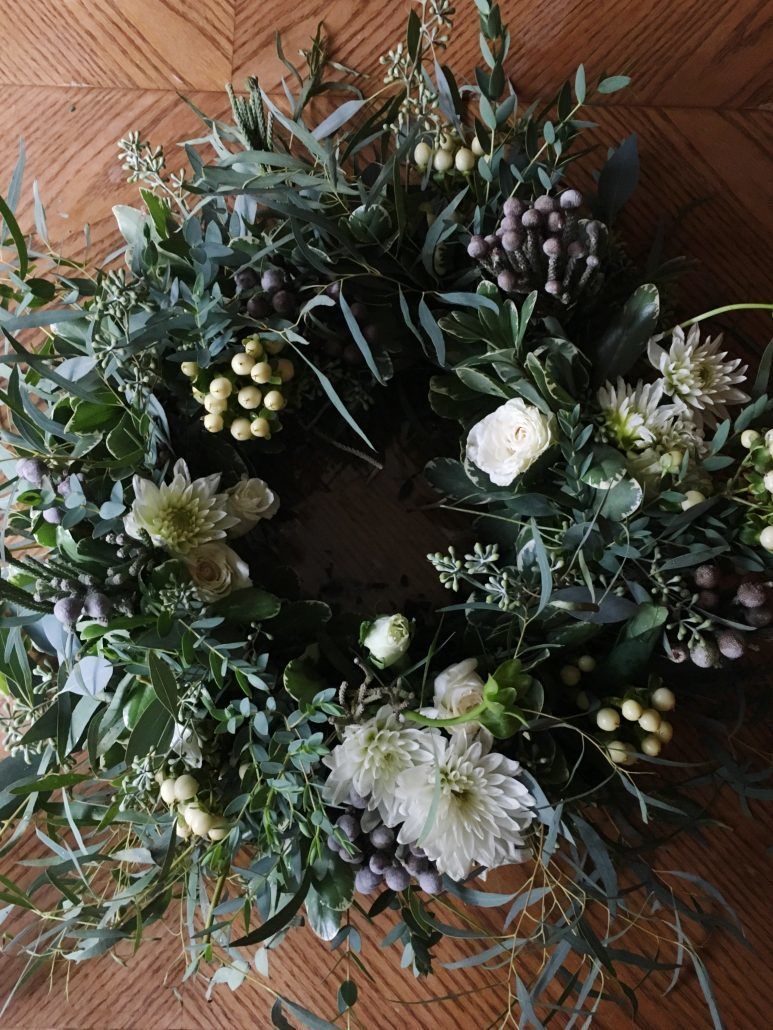
The Final Product! Greenery wreath with Dahlia, Spray Rose and Mums with Pillar Candle by Deanna Basile
Instead of making a traditional door wreath, we used gorgeous autumnal blooms and greenery to make a wreath centerpiece with a classic pillar candle inside.
Check out our how-to video below, along with a step by step tutorial!
For this arrangement, you will need the following supplies:
One 11” Aquafoam Floral Designer Ring
Bucket large enough to submerge ring, filled with water (this can also be done in a bathtub or sink!)
Floral Clippers
Pillar Candle or Large Votive Candle in Glass Cylinder Vase
6 Stems Pittosporum
8 Stems Feather Willow Eucalyptus
6 Stems Parvifolia Eucalyptus
4 Stems Seeded Eucalyptus
5 Stems White Hypericum Berries
5 Stems Silver Brunia
6 White Dahlias
3 Burgundy Dahlias
3 Stems White Spray Rose
5 Stems Burgundy Spray Mums
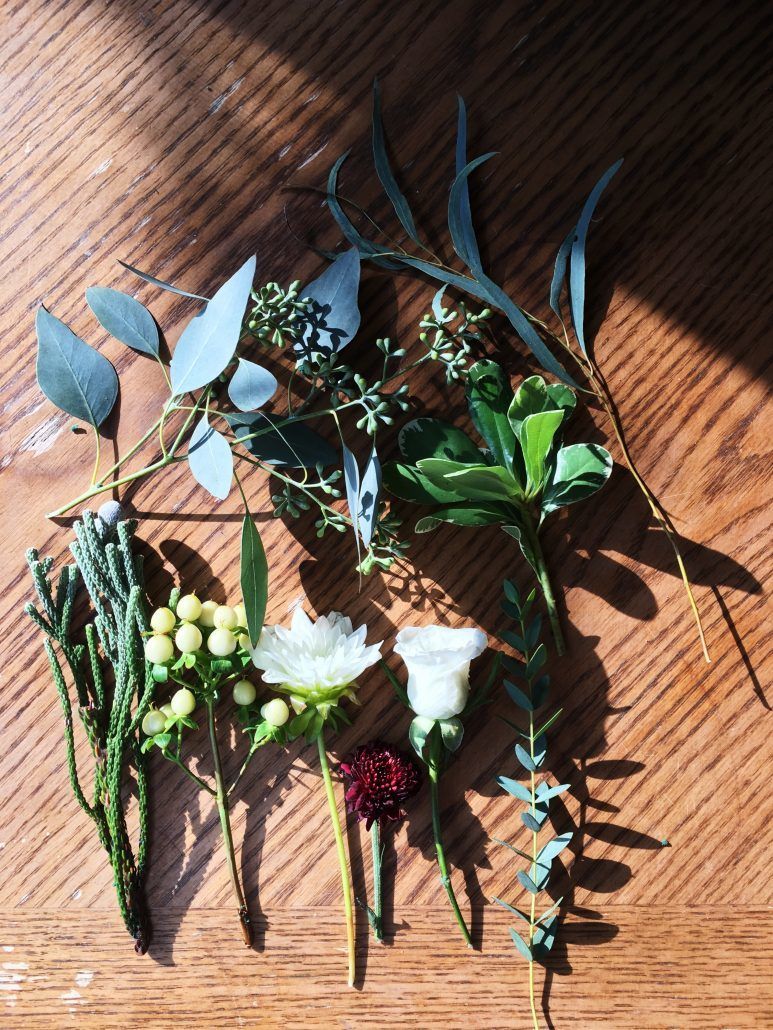
Clockwise from left: Silver Brunia, Seeded Eucalyptus, Pittosporum, Feather Willow Eucalyptus, Parvifolia Eucalyptus, White Spray Rose, Burgundy Mum, White Dahlia, White Hypericum Berries
Step 1:
Fill up a large bucket (or kitchen sink or bathtub) with room temperature water. The height of the water should be enough to cover your foam ring. Gently place the ring inside and let it naturally soak up the water. Do not force the ring down, as that will create air pockets. The Aquafoam will hold water for your flowers and greenery to absorb and is also treated with nutrients so your arrangements lasts longer.
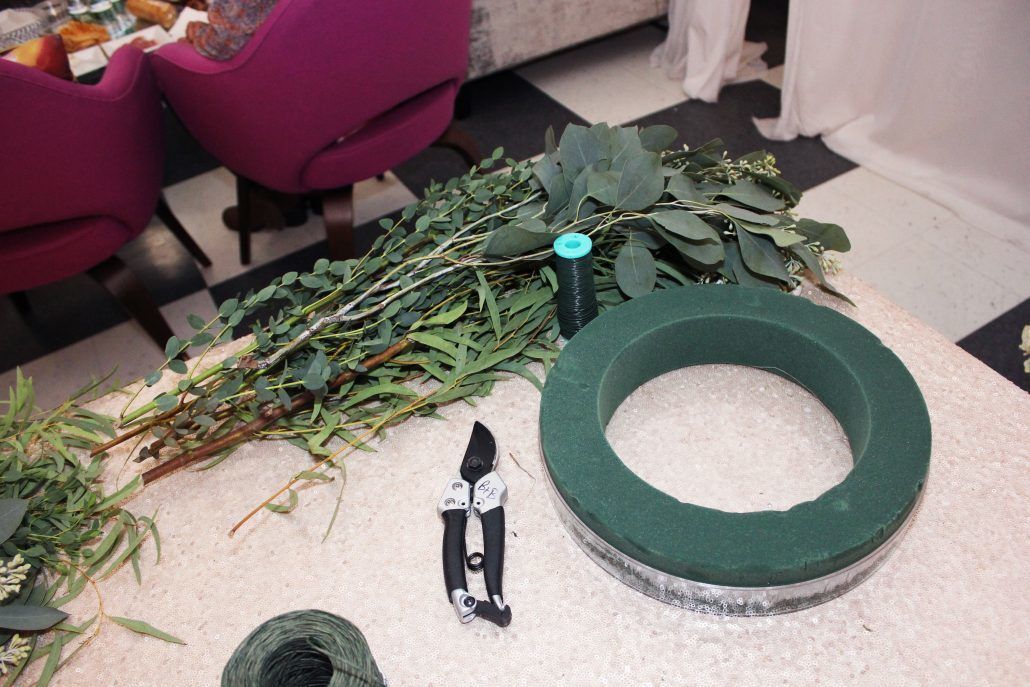
Clippers and pre-soaked 11″ Aquafoam floral designer ring
Step 2:
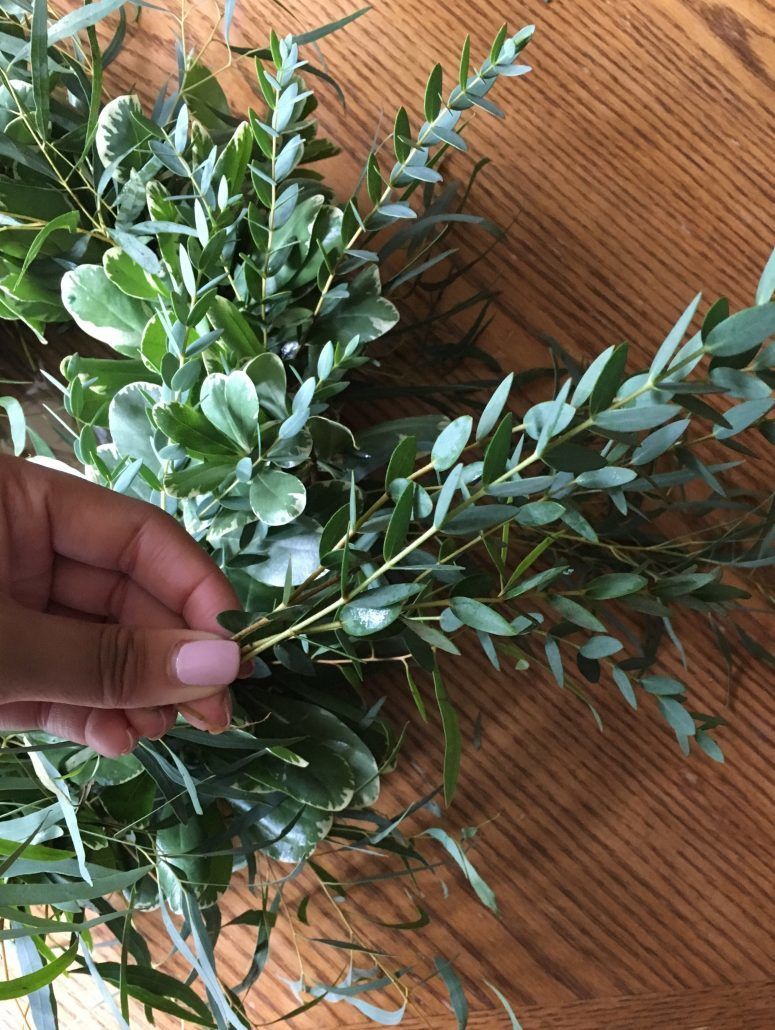
Clip you pittosporum into short pieces, about 3” – 4” long. Each stem of pitt should yield about 2 – 3 pieces. The pitt will form your base and cover the majority of the foam from view. Make sure to rotate your ring and fill in all the gaps, including the sides of the ring! Bianca taught us that you can alternate the angles of how you place the pitt to give the wreath more dimension. Place some standing straight up vertically and others at an angle.
Pitt base with precut greenery and florals. You can also cut the greenery and flowers as you add it to the wreath!
Step 3:
Repeat the process with your feather willow and parvifolia eucalyptus, clipping the longer stems into 4” – 5” pieces and layering throughout. Feather willow has long, elongated leaves and is great for giving the wreath movement and dimension. We bunched together a few pieces of parvifolia eucalyptus and clustered it in different places on the wreath.
Feather Willow added to top and sides of wreath
Parvifolia Eucalyptus detail
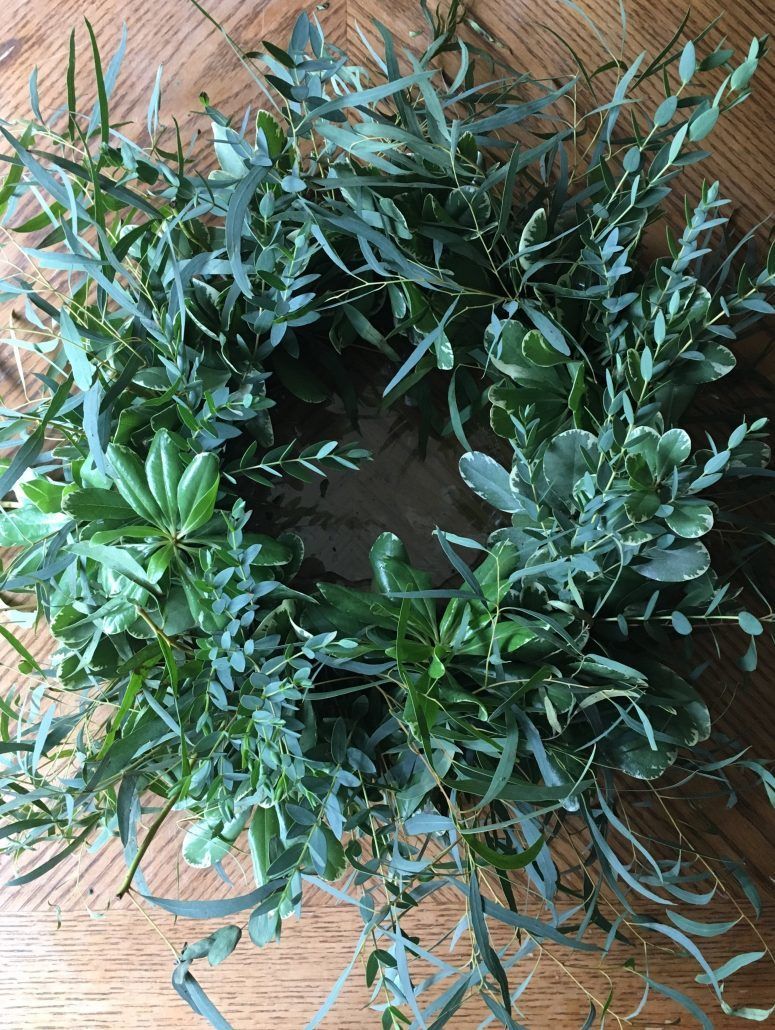
Parvifolia Eucalyptus added to wreath
Step 4:
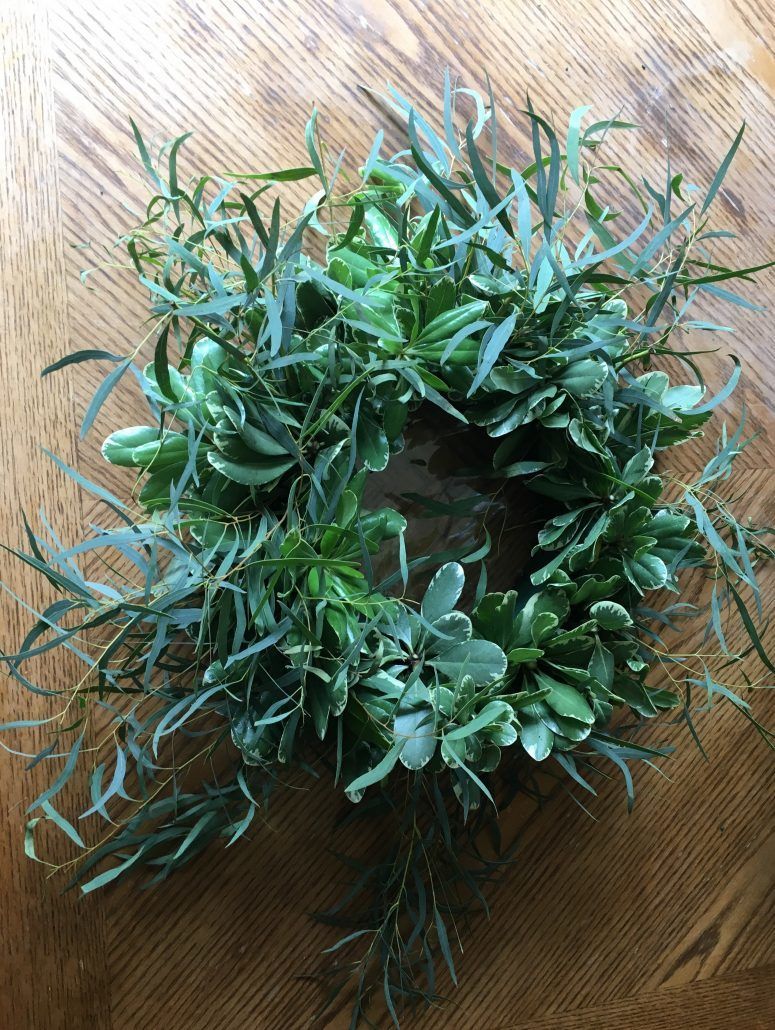
Now is the time to add in your final greenery accent, the seeded eucalyptus. This type of greenery is quite heavy compared to the rest, so feel free to trim some pieces to include only “seeds” and others to include only leaves. The “seeds” add a beautiful light green color and contrast as well as additional texture to your wreath. If you stopped here, you would have a beautiful, lush and full greenery wreath that could be displayed on it’s own!
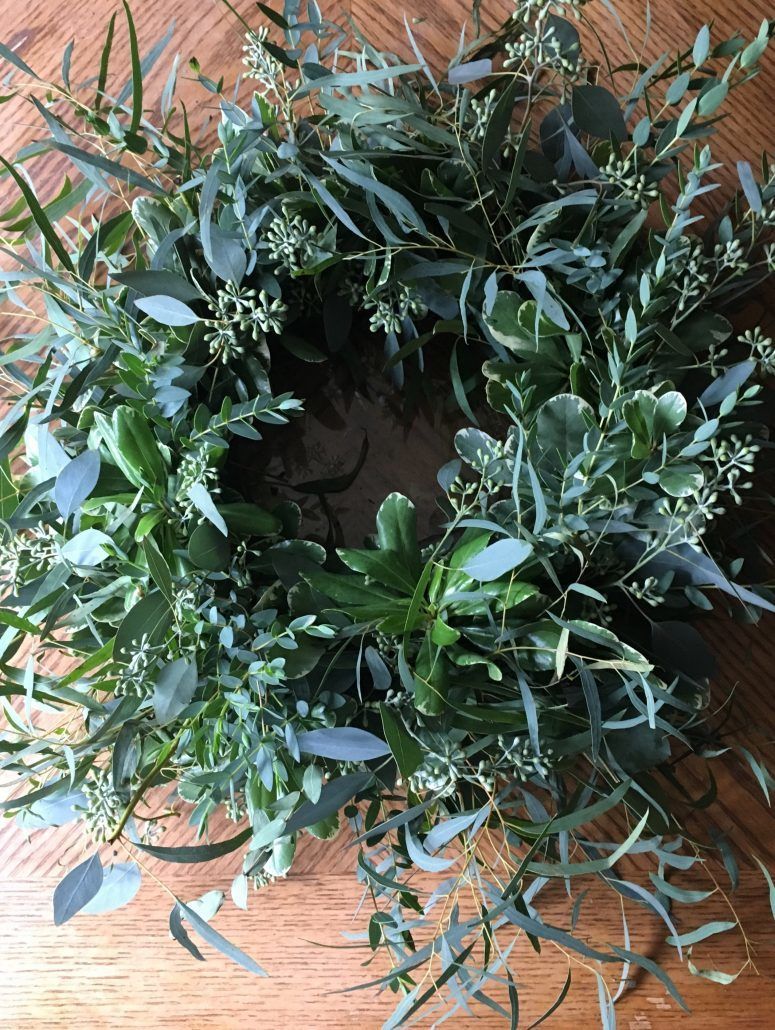
Beautiful greenery base complete!
Step 5:
Now is time to add your seasonal floral accents. We used silver brunia and white hypericum berries to give it an autumnal feel. The brunia almost looks like it came from the sea, or from some other planet. It’s got a really interesting surface texture, almost like velvet. The white hypericum berries give us that beautiful pop of white color throughout the wreath as well.
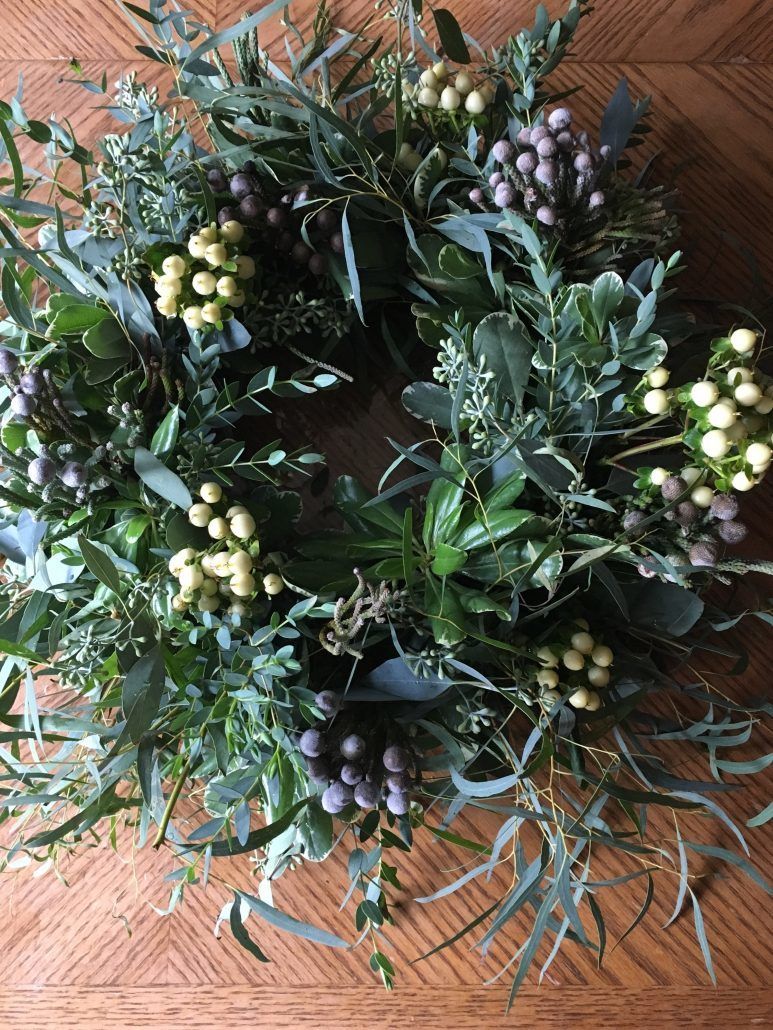
Hypercium and Brunia layers added to wreath
Step 6:
We put the flowers on our wreath last to keep them in water as long as possible. They are much more sensitive than the greenery! To start, Bianca taught us to cut the white dahlias at a sharp angle, as opposed to straight across the bottom, in order to increase surface area and allow them to drink more. We made an asymmetrical design, with two major focal points placed diagonally across from each other.
Dahlia added as focal flowers
Step 7:
We finished placing our florals by accenting the white dahlias with white spray roses, burgundy mums and burgundy dahlias. Bianca calls dahlias the “Diva of Flowers” because they are so sensitive to heat and light!
Last flowers added to wreath
Step 9:
That completes our floral wreath! Since the bottom is solid plastic, you can fill it with cool water now to make sure it soaks up as much water as possible! To help your flowers last as long as possible, periodically pull them out of the foam and re-clip the ends and refill with water. The greenery can last quite a white if you keep adding water, so you can use the same base throughout the season!
I added an 8” cylinder vase with my favorite candle, Nest Fragrance’s Grapefruit!
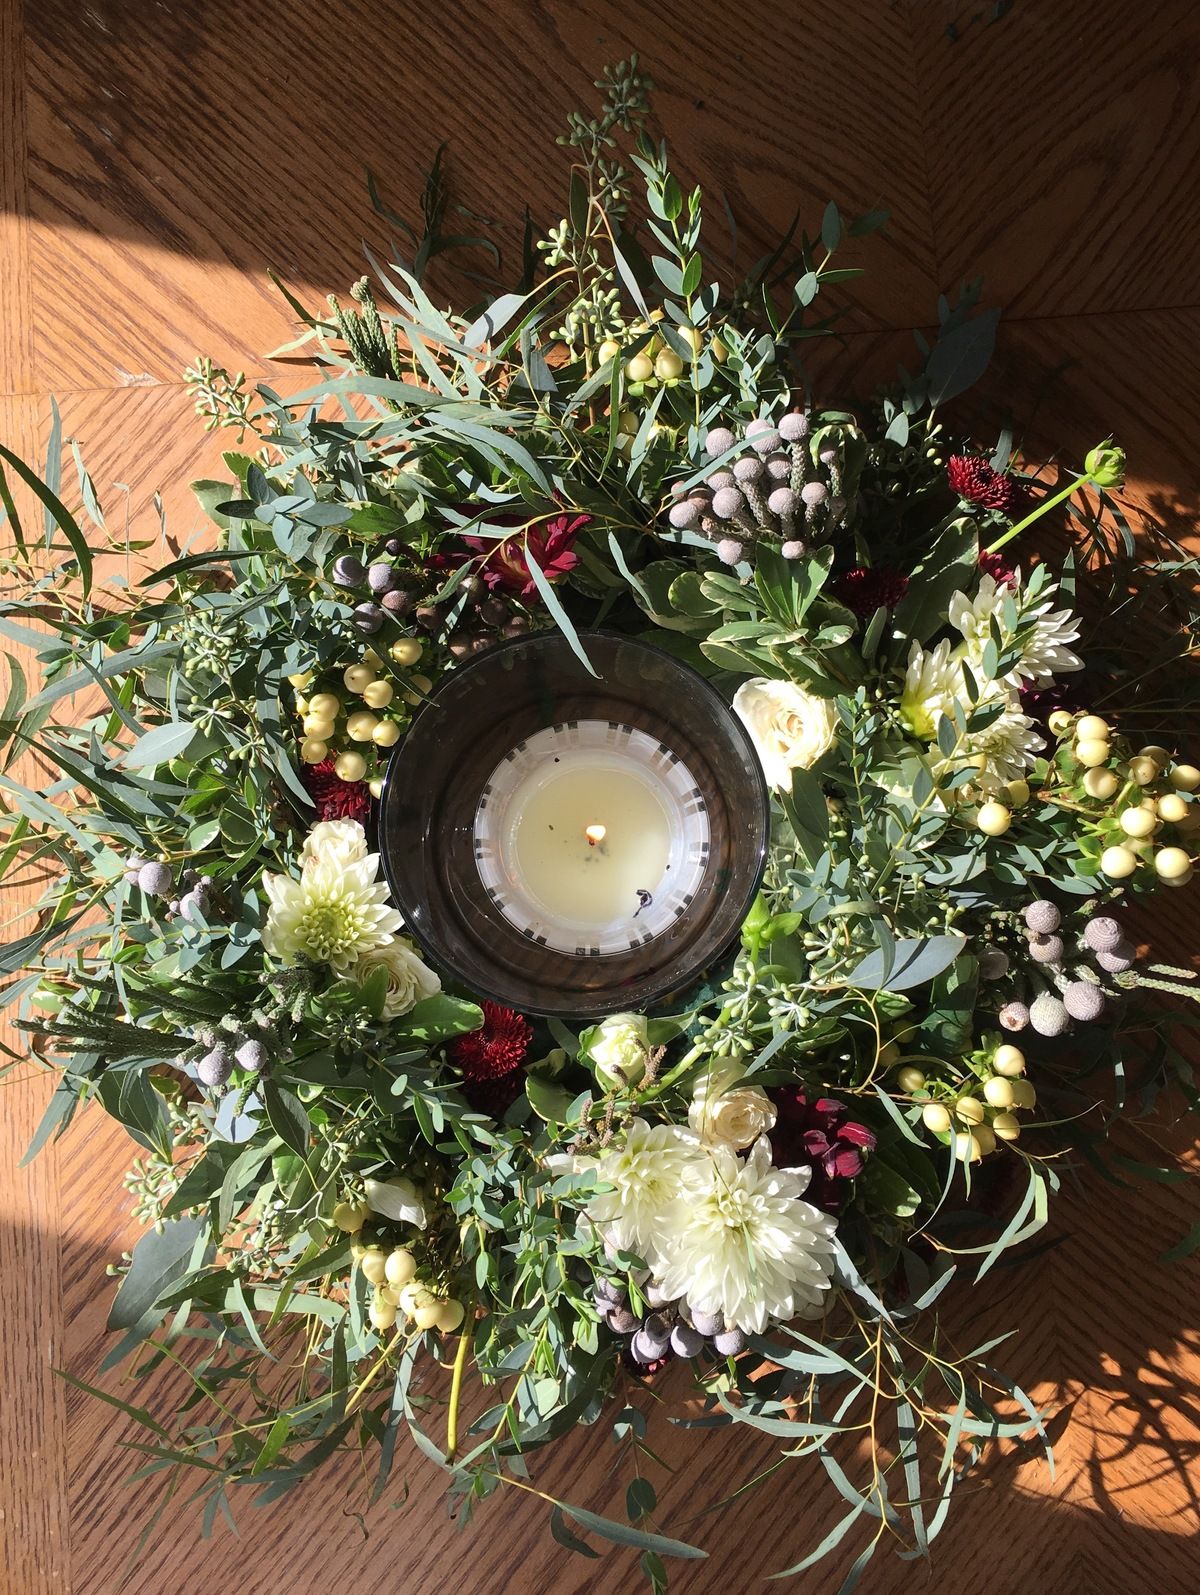
My finished product 🙂


